
the computing devices are popular now, the x86-64 home data server is important in the home, imaging when you going home, your mobile phone automatically connects to the home WiFi, a little while later, all the new photos of your mobile phone are backup to the home private cloud data center , the home storage or entertainment computer. (Only the newly added photos, after the backup, the photos on your phone you deleted will not be deleted on the server). The easy way to make this work for you, even if you do not know much computer knowledge (for example your parents, wife and children), you can also effortlessly save all the photos to your backup computer, we call this a private cloud in your home, it is more and more important to have such IT infrastructures , for data security and service convenience , most of the people will need this home private cloud server because we generate more and more data as the mobile device take a most important part in our working, living and entertainment , here is the Shiningintl integrated solution based on Shiningintl hardware and free software system—seafile.
Hardware:
Software:
windows 10 operating system
Seafile file share software
Step 1: find an fixed IP address for the Seafile server in your LAN
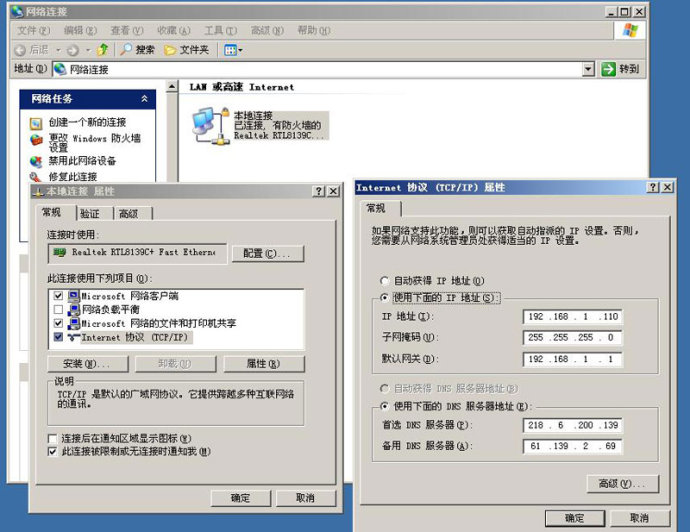
Most of the home LANs have the router DHCP server running, so the IP address of the router assigned to the Seafile server is variable, but unfortunately the Seafile needs a fixed IP, so we must set the fixed IP address up at first.
Find and record gateways of DNS servers
Run “command and prompt” to use the command
ipconfig / all
Find gateway and DNS server information as below picture:
Set up the fixed IP address on Shiningintl X86-64 computer

Step 2
Set up the seafile server based on the shiningintl X86-64 computing devices. The seafile software support windows, Linux , here we take the windows for example, step by step to demonstrate the setup procedures. If need the Linux setup,please contact the shiningintl tech support or find the seafile documents.
(1) Download and install python 2.7.11 32-bit version
Download link:
During the installation process, select “Add the installation path to the system environment variable” (the default is off), if not select that option during the installation, then you can manually add it to the system environment. For example, if you install python 2.7.11 in the C: \ Python27 path, add C: \ Python27 to the environment variable.
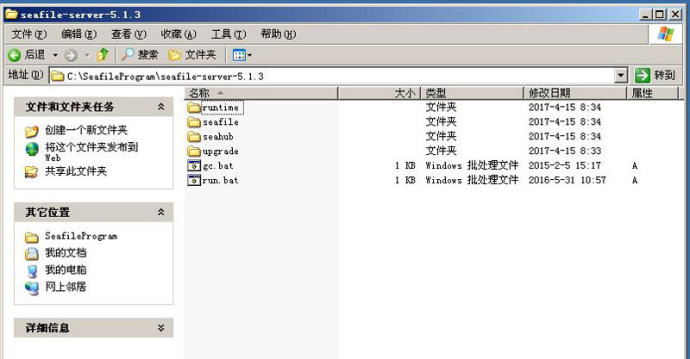
(2) Download and set up the Seafile server
Select “Windows version” seafile software,
create a folder Seafile in the C driver of your server hardware, and then download the compressed package to this fold and unzip it, that is the case in the picture
(3) start the Seafile server
Run run.bat to start the seafile server, designates a fold where the server data is stored.
For example, if choose E disk, then the data folder for the E: \ marile-server
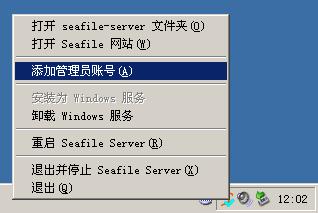
(4) Add an administrator account
Right-click the Seafile server’s system tray icon on the right-bottom and select the “Add administrator account” option.
input your administrator user name and password In the pop-up dialogue.
shiningintl home private cloud system–create administratior account
(5) configurate the Seafile server
After initializing the server, you need to configure the following options, otherwise you can not upload files:
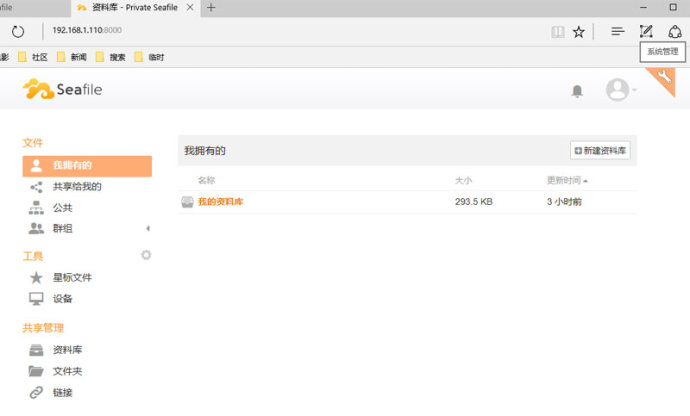
Enter your server’s IP address and port number in the browser address bar (default 8000), such as:
http://192.168.1.110:8000
Log in with the administrator account and password you just created
Shiningintl home private cloud system–config ip address and port
Click the tool icon in the upper right corner as picture
Select the settings, uses the server the fixed IP in the LAN to fill these two locations

shiningintl home private cloud system–config ip address and port 2
(6) add regular users
Select “User” – “Add User” to add a regular user.
By default, the new user will be asked to change the password when the first time login.
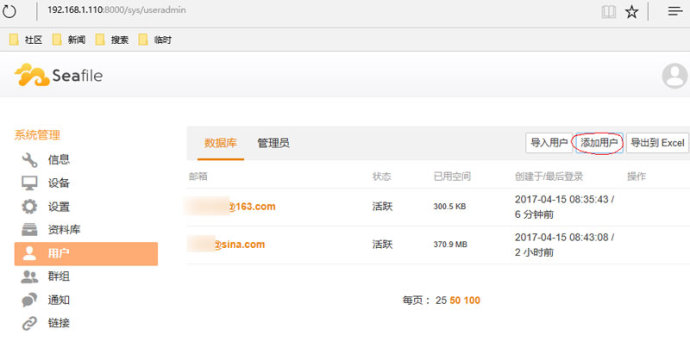
Shiningintl home private cloud system–add normal account
(7) Install Seafile as a Windows services
Right-click the Seafile server tray icon and select the “Install as Windows service” option
In the pop-up dialog box, click the Yes button, then the seafile will setup as a windows service, it will launch automatically when the windows start up.